Showing posts with label Holidays. Show all posts

9/2/15

Autumn Heart Door Hanger

A couple of years ago I gathered a bunch of horse chestnuts. I think they're so beautiful and I just knew I'd think of something fun to do with them. I've enjoyed displaying them in jars with other fall items, while I waited. A few days ago, I finally had the perfect inspiration! I'm so excited to share this beautiful autumn heart project and I hope you love it as much as I do!

I started with a piece of corrugated cardboard cut into a heart. Then, using school glue, I glued dried green moss to one side letting it hang over the edges. After letting it dry for a while, I used scissors to cut off the overhanging moss. Then, using horse chestnuts, acorns, and hot glue, I created a simple design on the heart. I made sure to press each chestnut or acorn into the moss very firmly as I glued them. Lastly, I hot glued a bit of twine on the back for hanging it.
If you decide to use acorns, you might want to check out this post HERE to find out how to pre-treat them. Trust me, I know from experience, you won't want to skip this step.

I am displaying mine on a dresser top for now, but I might hang it on my front door eventually. I think it'd be a nice alternative to a wreath. Just be sure it's not on a door that's exposed to the elements because cardboard and moisture don't mix well.
I love that it's in the shape of a heart because I love the Fall season. It's almost here! Check out some of these other fantastic Fall crafts:

8/26/15

Acorn Toadstools

 
 My husband was driving up in the mountains the other day and saw some of the trees were beginning to change color! Fall is quickly approaching, and I'm excited because it's one of my favorite seasons to decorate for! I love using natural elements in my fall decorating and I love little details. This project is fun, simple, and so cute!

Supplies needed:
Acorn tops
Hot glue gun and glue
Twigs
Clippers
Cotton balls
Optional: paint

Glue a tuft of cotton into the inside of the acorn top. Into the center of that, glue your little twig use the clippers to shorten your twig if necessary. Once the glue is dry, blow on the cotton or gently brush it with your fingers so it flares out up and around the acorn mushroom top.

At this point, your mushroom could be finished if you want it to stay natural. You could also pull out some paints to decorate it. I plan to use inexpensive acrylic paints to make the mushroom/acorn top red then paint little white dots.

Once you're done with your mushroom, have fun decorating with it! Try making a mushroom "terrarium" in a little glass jar, or gather a few together with string in a tiny mushroom bouquet. I think little red mushrooms will look especially cute in a fairy garden, maybe even with a little glittery fairy dust. There are so many fun possibilities!
How will you use your acorn mushrooms?

For other fun acorn projects, check out these posts:
 photo TWTfeatured_zps4mrhyudc.jpg

11/21/13

Sparkly Snow Trees

I know, I know, it's not even Thanksgiving yet... I'm not one to decorate for Christmas until after Thanksgiving. In fact, I really love the autumn season and I'm always truly a little sad to see it go, but I also love winter and Christmastime! If I'm going to decorate homemade style, then I have to plan ahead. Life gets busy during the holidays and if I don't start creating early, then I may not get my decorations done at all.

It is rainy and dreary outside my window today, although I'm expecting the raindrops to turn to snow at any moment because it's getting quite cold out there. It's a perfect day for staying indoors and creating.

Step One: Start with a rectangular piece of thin cardboard, such as a cereal, or cracker box, etc. Roll it into a cone and secure using staples and/or glue. I think the easiest way is to use a couple staples to hold things in place, then hot glue to seal it up. Use some sharp scissors to cut the bottom of the cone so that it sits evenly. Once you have your cone, you are ready for the next step.

Step Two: You will need cotton balls, a hot glue gun with glue, and scissors. Cut a bunch of cotton balls in half and use the glue gun to begin attaching them to the cardboard cone. Start at the bottom and work your way up. Try not to leave any spaces between the cotton balls. once you get to the top, take a half a cotton ball and poke/pull the center into a point, so it makes a nice top for your tree.

Step Three: Use a stiff paintbrush to gently fluff out the edges of the cotton balls, then use your hands to press the fluffy stuff smooth against the tree. This step blends the edges of the cotton balls into each other a little bit, to give a softer look.

Step Four: Mix a little bit of water into some glue. Use a paintbrush to "paint" the glue onto the cotton ball tree in whatever fashion you desire. I did some randomly curvy brushstrokes. Then sprinkle with glitter. You can also roll it across a pile of glitter. I did both methods and I think I prefer the rolled way, but they both work well. Let your tree dry, knock off excess glitter, and you're done!
This is pretty simple, but I love how they turned out. I put them away for now and will pull them out later when I do my Christmas decorating. I'm getting excited!

Shared Here:

11/11/13

Last Minute Thanksgiving Decor

Sometimes things sneak up on you. You think you've got all this time and then suddenly you look at the calender and realize that Thanksgiving is only a almost here!

One thing I love about Thanksgiving is that it's kind of the last hurrah for the autumn season and there are so many natural elements that you can use to decorate for the fall. If you're running out of time and you need some ideas for quick and fun Thanksgiving or fall decor, give these a try!
These are all very inexpensive; I just used things I already had on hand. They are also very easy. If you can handle simple tasks involving cutting, gluing, and writing, then this will be a piece of cake (Mmmm... CAKE! That sounds good! I might have to do some baking later today!).

Autumn Leaf Wreath:
The idea is very simple. Glue some fall leaves to a cardboard circle and you're done. There are a few tips though that will make this easier. Choose leaves that are mostly dry so they will keep their shape better and work gently because any dry places will crumble if you use too much force. Also, use larger leaves in the back, smaller ones in the front. I used a variety of maple, and tulip tree leaves. I have neither one of these trees. It has been rather windy lately and these leaves blew into my yard just so I could use them to create fall decorations. How nice!
Autumn Leaf Garland:
All you'll need for this simple leaf garland is string, wire, or ribbon, glue and an assortment of leaves. Arrange your leaves in the order you want them, or grab them randomly. Glue them along your string and hang them up to enjoy. As with the wreath, use mostly dried leaves so they keep their shape better. Some curling will happen and that's ok. If you use completely dried leaves, they will be very brittle. Work gently so as not to crush the drier parts of the leaves. Also, you may choose to cut off the stems or leave them. I cut mine off, but it doesn't really matter.
Thankful Banner:
This is the most difficult of the three projects, but it's very simple also. Cut uniform triangles out of brown paper grocery bags. Stamp them all over with various leaf patterns in fall colors, then use a good quality marker to write the letters. I spelled out "Thankful", but you can choose any word (or words) you please. Next, glue them onto a ribbon. You could also use decorative yarn, string, or whatever strikes your fancy.
There you are! Three simple ideas to decorate for this season. I hope you enjoy them and maybe they will inspire you to come up with some other ideas as well. If you have more time on your hands, consider checking out these other fall decorating tutorials:
Acorn Branches

Shared at these blogs:
Craftastic Monday at Sew Can Do
Monday Funday at Lines Across My Face
What'd You Do This Weekend at Tumbleweed Contessa 
Manic Monday at Serendipity & Spice 
Link Party Tuesday at A to Zebra Celebrations
Tuesdays with a Twist at Stone Cottage Adventures
30 Day Holiday Linky Party at The Shady Porch
Cottage Style Party at Lavender Garden Cottage
Down Home Blog Hop at Tilly's Nest
What We Accomplished Wednesday at Green Willow Pond
Work It Wednesday at The Happy Housie
Lovely Ladies Linky at Life With The Crust Cut Off
Whatever Goes Wednesday at Someday Crafts
Home & Garden Thursday at A Delightsome Life
Treasure Hunt Thursday at From My Front Porch To Yours
Four Seasons Blog Hop at Easy Life Meal & Party Planning
Clever Chicks Blog Hop at The Chicken Chick
Sunday Linky at Suburbs Mama
Silver Pennies Sundays at Finding Silver Pennies
Creative Home and Garden Hop at Little Homestead On The Hill


10/25/13

Acorn Branches

Recently at a craft store, I came across an ugly item. It was a hideously fake-looking branch with poorly made plastic acorns stuck to it. You'd have to see it to believe me, but it was just not right. It was also an outrageous price! I picked it up, gasped at the price, and thought to myself, "I could make something much cuter for much (MUCH!) less money!" So, I went home and did. Now I'm passing the idea on to you! You don't have to settle for expensive, poorly manufactured acorn branches anymore. You're welcome!
Remember those acorns I collected and de-bugged and used for two different fall projects so far? Well, I still have lots left over! Hooray! I'm so glad I gathered so many because I am having lots of fun using them to decorate this season! Please refer to my Twig & Acorn Wreath post to see how to de-bug your acorns for using with craft projects. I also used a few Brown Paper Bag Leaves, like the ones I posted about last week.
I started with some branches from my yard. You might also find suitable branches at a florist shop or craft store if necessary. Using a hot glue gun, attach a few acorns onto your branches in random, natural looking places until you reach the desired amount. It looks pretty cute like this and you could definitely use them this way. They would be great mixed into a fall bouquet or just in a vase by themselves. The ugly branches at the store were just bare with acorns, but these natural looking ones look 200% better than those ones!
Personally, I think the leaves add a nice touch though and I'm really happy I went with them. If you want to add leaves on yours too, then take a few minutes to create some paper bag leaves (read about how to make them HERE). Glue a few leaves to your branches. Once the glue is dry, you're done and ready to decorate with them!
Shared At These Great Blogs:

10/14/13

Brown Paper Bag Leaves

Right inside my entryway, I have a vintage vanity dresser. It makes a great place to decorate for the different seasons. This fall, I decided I wanted a garland draped across the top of the mirror. I started with a few corn cobs. These are strawberry popcorn cobs and later I will probably eat them. Yum! I love popcorn! Then I wanted to fill in with something leafy. I could see in my mind, a garland of beautiful fall leaves and I loved what I saw! There was however, a slight problem: I'm an impatient person. I like to gather a lot of my own fall decorations from nature, but nature wasn't working fast enough for me. Although the leaves are beginning to turn colors in the nearby mountains, I've been so busy at home that I haven't found time to go on a leaf gathering trek. And then there was the issue of how to keep the natural leaves looking the way I wanted. Leaves dry out and curl up pretty quickly and that wasn't quite the look I had envisioned. There are a few methods of preserving falls leaves, but nothing really grabbed my attention... One morning, I decided I needed to just make my own leaves. I'm quite pleased with how they turned out! The best part: they were easy to make and cost me nothing because I had everything I needed already.

Before I settled on this leaf making method, I tried a few other things that didn't turn out the way I wanted. My sweet husband is such a supporter of my creativity. He came home from work that evening to find the house had exploded with art supplies. Rubber stamps, scissors, paints, tissue paper, glue, random bits of paper... *sigh* I really enjoy an organized house, but sometimes when I get really excited about creating, things get out of hand. Luckily instead of reacting to any of the mess, he just raved about my paper leaves. What a great guy! I had to spend a good amount of time putting things back in their proper places, but I think the finished project was worth the art-supply tornado aftermath. Here's the method I came up with so you can make your own brown paper bag leaves.

Supplies you'll need:
A brown paper bag or two (large heavy-duty grocery store type) or thick brown craft paper
Scissors
Acrylic paints in your desired color scheme.

1. Cut out your leaves. I folded a section of paper in half and then just free-hand cut into an oak leaf shape, but you could choose any type of leaf shape you wanted. I cut out a variety of sizes and since I was free handing it, each leaf was a little different. I think it turned out really nice that way.
2. Paint your leaves. I used yellow red, brown, and black acrylics paint to mix up a variety of fall leaf colors. Some leaves I did a wash style painting using lots of water and a just a little paint. Other leaves I painted more thickly, but even then I diluted it some so it wasn't too thick. I wanted the colors to look rather muted. Some of them, I just painted evenly one color, others I did with more detail, others still I was more random with the coloring. Try a few things out to see what you like best. It's fun! Turn on some music or put on your favorite movie and paint away! Set them to the side to dry.
3. Shape your leaves. This really is the finishing touch. Once the leaves are basically dry and starting to curl up, gently crease down the center of the leaf and then down the sides to mimic the veins of a leaf. You don't want hard creases, and they also don't need to be perfectly in line. you just want to add some subtly shape to your leaves.
4. Decorate with your leaves. This is the best part! I used my leaves to fill in my fall garland. I started with some natural colored yarn, tied the corn cobs on, and then used a hot glue gun to attach my paper leaves to the yarn in between the corn cobs. As a finishing touch, I used some extra acorns from my 
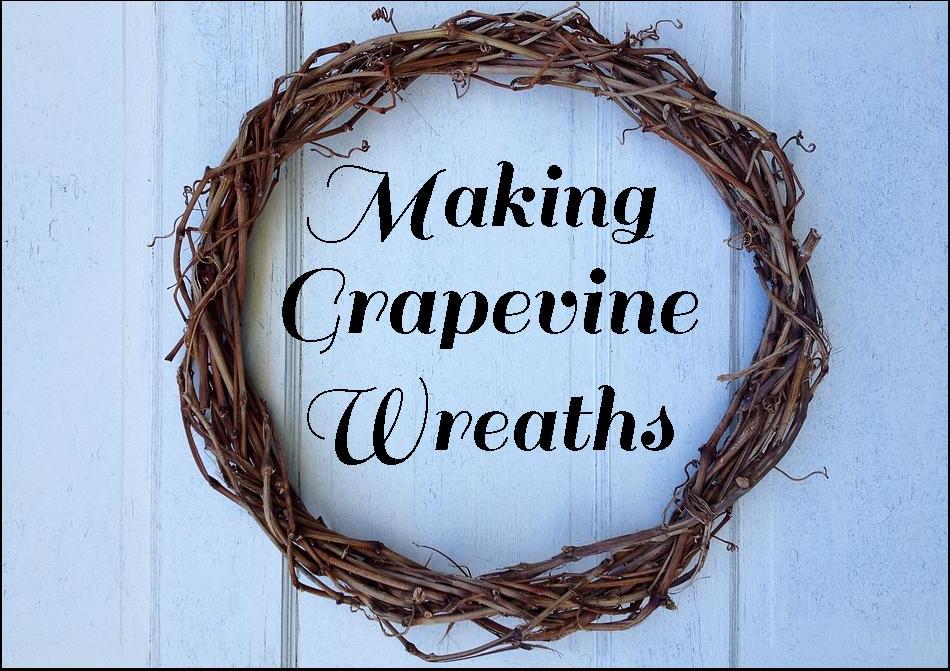
twig and acorn wreath project and glued a few of them on with the leaves. These look beautiful as a garland! I also glued some to mono filament and hung them in my front window. I'm not done decorating in my window. It needs something else, but so far, I'm loving the falling leaf look! I have a few other ideas of how I'm using my paper leaves as well, so you might see more of these in the future. I'm thinking I might decorate some of my grapevine wreaths with these. What do you think?
If you make some paper leaves, I'd love to hear how you decorated with them. There are so many possibilities! Have fun!
Featured Here:
Lavender Garden Cottage
The Shabby Nest
Oak Hill Homestead
Oak Hill Homestead

Shared Here:

8/29/13

Making Grapevine Wreaths

I have a monster grapevine in my backyard! It's a very old and delicious seedless variety that was planted long before we lived here. It grows like a weed! It's a good idea to prune back some of the runners in the summertime. This helps the vine put more energy into the fruits. It also helps us find the clusters of grapes more easily.

Craft stores regularly sell grapevine wreaths in all sizes; they are great for a multitude of different decorating and crafting purposes. But if you have a grapevine growing in your yard or garden, then there's no need to purchase one. They are easy and fun to make!
The preparation: Prune those extra long, fruitless vines off your plant. From the vines you've pruned off, select the longest ones. You want them to be green and pliable as well. Do this soon after you prune; they start becoming brittle as they dry out. Remove the leaves, but leave the curly tendrils. Once you have a good selection of de-leafed vines, you are ready to begin.

The Project: Start with a nice long vine and curl it into the size of wreath you desire.
Wind it together to create a simple circle and tuck in the loose ends. Don't worry if it's not a perfect circle. You will be able to shape it easier as you add more vines. Tuck the end of another vine into the circle and then wrap it around, tucking in the other end as you finish. Use more vines to wrap around and around. As you go, wrap the vines in different directions and start in different locations. As it becomes thicker and stronger, you can pull it into a nicer circle and it will hold it's shape.  Stop when it is firm enough to hold it's shape and when your desired thickness is achieved. Let them dry on a flat surface until they are brown and thoroughly dried.

This is a great project for a summer or fall evening. My home doesn't have air conditioning of any kind, so we like to sit outside in the summer evening and enjoy the cooler air. Plus, we just love being outside! The other day, we spent an hour or so in our backyard. My husband played his guitar and I made three grape vine wreaths of varying sizes. I love lazy summer evenings like that!

I am already brainstorming on some great ways to use them, so watch for follow up posts...
Check out another great wreath idea using twigs and acorns HERE.
Shared at these great blogs:
The HomeAcre Hop at Black Fox Homestead
Home Sweet Home at The Charm of Home 
From the Farm Blog Hop at Sunny Simple Life 
Clever Chicks Blog Hop at The Chicken Chick
Creative Home & Garden Hop at Little Homestead on the Hill 
Sunday Linky at Suburbs Mama 
Silver Pennies Sunday at Finding Silver Pennies 
Tuesday Garden Party at An Oregon Cottage 
Garden Tuesday at Sidewalk Shoes 
Tuesdays with a Twist at Stone Cottage Adventures 
Rock 'N' Share at The Shady Porch 
The Backyard Farming Connection Hop 
Down Home Blog Hop at Tilly's Nest 
What We Accomplished Wednesday at Green Willow Pond 
 Feature Friday at Blissful and Domestic
Craftastic Party @ Sew Can Do
Monday Funday at Lines Across
Mostly Homemade at Homegrown & Healthy
What'd You Do This Weekend? at The Tumbleweed Contessa
Cottage Style Party at Lavender Garden Cottage

Thank you Silver Pennies!
Thank You Summers Acres!
Thank You 1840 Farm!
The Chicken Chick
Thank You Chicken Chick!

7/24/13

Pioneer Pudding

I grew up enjoying a tasty treat made from an old recipe with a very unfortunate name. It was a traditional English dish called "Lumpy Dick". ...SIGH... Yes, I know some of you are snickering... "Dick" is simply a boiled pudding in this case. But you can see why I sometimes avoided telling my classmates what I'd had for breakfast... I've decided to rename it in honor of my pioneer ancestors who made it: Pioneer Pudding!
While this isn't a fancy dish in any way, it's comfort food for me. The original recipe is not gluten free. So here is my modified gluten free version of Lumpy... I mean Pioneer Pudding! I think my ancestors would be proud of how I've adapted it to meet my needs, while still keeping it simple.

Pioneer Pudding:
2 cups of milk (Make this milk free and vegan by using  your favorite non-dairy milk!)
1/2 tsp vanilla
1 heaping  TB buckwheat flour
3 heaping TB brown rice flour
1-2 tsp sugar depending on how sweet you like things.
1/2 tsp cinnamon
pinch of salt

Mix flours, sugar, cinnamon and salt together well and set aside.
Bring milk and vanilla to a strong boil in a sauce pan. Don't allow to scald. Gently add spoonfuls of the flour mixture to the boiling milk. Stir constantly. Lumps will begin to form and this is good. Break apart any lumps that are too big. You want them to be about pea or blueberry sized. If they are too big you'll end up with dry flour on the inside and that doesn't taste as good. When all of the flour mixture has been added, turn stove to low and continue cooking, stirring often for about 10-15 minutes until the pudding thickens. You want those lumps to thoroughly cook, so give it some time. Let cool for a few minutes and serve warm.

My ancestors probably didn't add the vanilla, sugar and cinnamon, This was a simple food that they made when times were hard and they didn't have much. I feel incredibly blessed to have so much available to me in my lifetime and I'm grateful for the heritage of simplicity, self reliance, and thrift that my fore bearers left me.

Enjoy a couple of treasures from my family: 
A photo of my great grandmother, Jane. I love hearing stories about her. She was known as a great horsewoman and I've always loved horses, so I feel a special kinship towards her.
A sampling of some of my grandmother, Hannah's hand made lace. My grandma enjoyed making things to give to her family. I have several beautiful handmade treasures from her. 
 

Linked up to these Lovely blogs:

12/3/12

Snowy Window Display

I once worked at a cute little shop and one Christmas got to display some decorative panels made with fishing line and white pom poms. They were so cute and ever since, I've been wanting to recreate the idea.
This is the first Christmas living in my new home which has a large front window. I knew as soon as I saw this window that it wold be perfect! It was pretty simple to make, but it did take a little bit of time. Putting on a Christmas movie to watch while you string the pom poms is a great way to make things go more quickly. I found the pom poms on sale at Michaels and I used two different sizes. I also picked up a few inexpensive snowflake ornaments to mix in. I finished the look with fluffy fake snow on top of some decorative white lights along the windowsill I hope this inspires you to create something great for yourself!

(Do you see all those trails across the snow in my yard? Those are from a rooster pheasant who makes his rounds across my front porch and right through my yard, every afternoon lately! He's so beautiful! I keep trying to capture him in a photo, but he's very camera shy.)
I love how this turned out! I've had many compliments on it including one from a complete stranger who stopped by one afternoon to tell me how great it looked. It's really hard to capture in a photo, but I tried. Also, please excuse the very dirty windows. I ran out of time during the warm weather and there's no way I'm going outside to wash windows now! Brrr!

Blogging tips